Home Tags Posts tagged with "cupcakes"
Tag:

cupcakes

Honey Lemon Cupcake with Yuzu Swiss Meringue Buttercream and Honeycomb

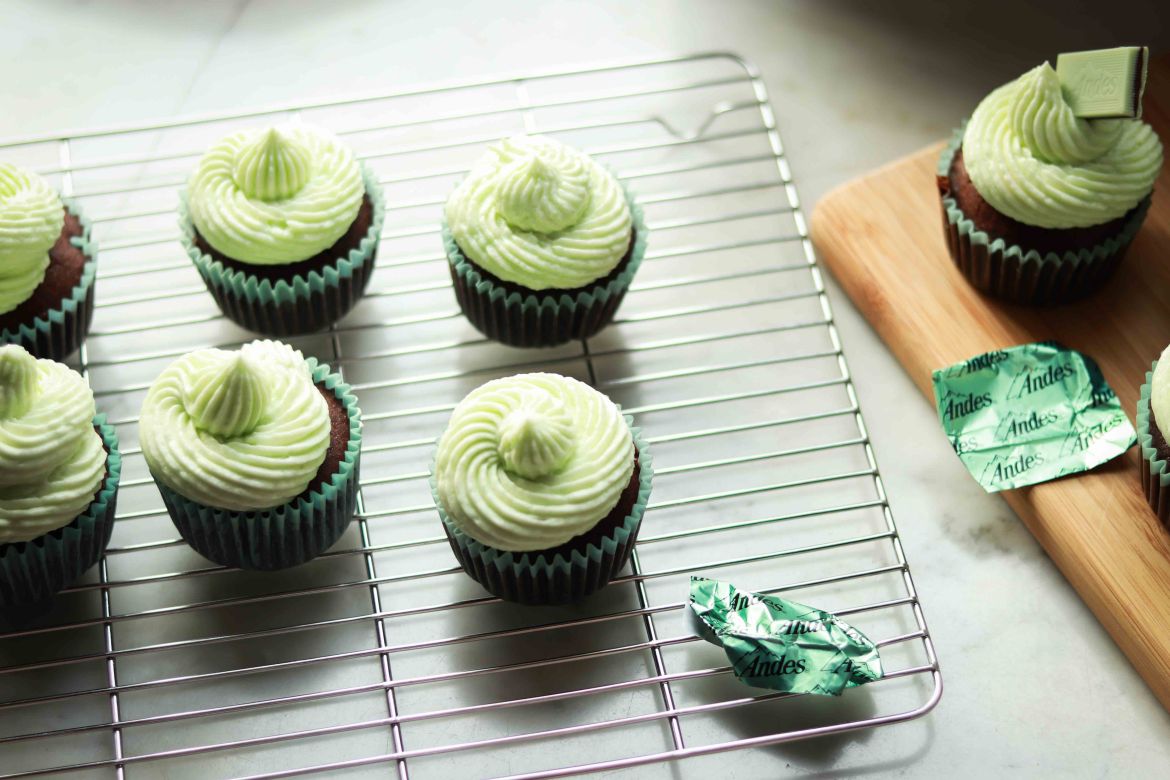
These honey lemon cupcakes with yuzu swiss meringue buttercream are heavenly –  light, refreshing and full of citrus flavour – and the additional homemade honeycomb on top gives you a perfect sweet crunch when you bite into it.

Honey Lemon Cupcake with Yuzu Swiss Meringue Buttercream and Honeycomb2

Honey Lemon Cupcake with Yuzu Swiss Meringue Buttercream and Honeycomb3


I’ve always wanted to try to make desserts with yuzu because i just find it has a floral, citrus aroma that makes it so special among all the citrus. It might still not be a popular item in western countries, but it has always been part of asian culinary culture, especially in Korea and Japan. Yuzu fruits are not readily available in Australia, and I had been on the search of yuzu puree/juice for a while. That said, feeling exhilarated is probably an understatement the moment i saw it on an asian store’s shelf a couple of weeks ago. In this recipe, the subtle incorporation of lemon and honey is just to complement, if not enhance, the yuzu flavour, which is the hero of these cupcakes.

Honey Lemon Cupcake with Yuzu Swiss Meringue Buttercream and Honeycomb1

Honey Lemon Cupcake with Yuzu Swiss Meringue Buttercream and Honeycomb5

So I guess I should do a little update of my school life here.

TIME DOES FLY. I am now in the superior level – the third and final stage of my certificate III of Patisserie @ Le Cordon Bleu Sydney. During this term, we are focusing more on marzipan, mousse-based cake and entremets (basically, entremet refers to multi-layer mousse cake of various flavour combination and textures). I used to feel terrified of making entremets as the timing was so tight to complete an entremet within a 3.5-hour practical class and my cakes were usually not frozen solid enough for the final glazing. However, as I got to practise more, I’ve learnt to organise better and work faster in the kitchen and I start to feel more in control of things. The cakes that I share below are two of my favourite entremets made at school. The first one is passionfruit and white chocolate entremet that taste luxurious from top to bottom, and the second one is gianduja entremet bursting with tropical flavours.

passonfruit and white chocolate entremet

passionfruit and white chocolate entremet

gianduja entremet1

gianduja entremet

Next week, we are going to have a trial of making our own entremet for our final assessment. It’s the time for all students to show what they’ve learnt in the past nine months and I can’t wait to test my ideas and bring my design into life! Enjoy your weekend!

Honey Lemon Cupcake with Yuzu Swiss Meringue Buttercream and Honeycomb4

Ingredients:

For the cupcake

  • 190g all purpose flour
  • 1 tsp baking powder
  • ¼ tsp baking soda
  • ¼ tsp salt
  • 130g butter, softened
  • 80g caster sugar
  • 30g honey
  • 2 whole eggs, room temperature
  • 120ml milk
  • 1 tsp vanilla
  • 1 lemon, zest of

For the yuzu swiss meringue buttercream

  • 150g egg whites (around 5 eggs’ worth)
  • 200g caster sugar
  • 280g butter, softened and chopped into small cubes
  • 3 tbsp yuzu juice
  • 1/4 tsp salt

For honey comb

  • 300g granulated sugar
  • 150g honey
  • 80ml water
  • 50g golden syrup
  • 1 tbsp baking soda

Instructions:

For the honey lemon cupcake

  1. Preheat oven to 350°F (175C) . Line pans with cupcake liners.
  2. In a mixing bowl, sift and combine flour, baking powder, baking soda and salt. These are your dry ingredients. Set aside.  
  3. In another mixing bowl, using a hand-held mixer or an electric mixer with a paddle attachment, beat butter, honey, sugar, and lemon zest on medium high speed until creamy and smooth. This will take around 4-5 mins.
  4. Add eggs, one at a time, and continue beating for 1 min. Add milk and vanilla. Continue beating for 30 secs.
  5. In 3 batches, pour the prepared dry ingredients into the mixture, and gently stir with a spatula until incorporated. Don’t overmix.
  6. Fill cupcake liners to nearly full and bake for 18-20 minutes, until a toothpick inserted in the cupcake’s centre comes out clean.

For the yuzu Swiss meringue buttercream

  1. Add  egg whites and sugar to an oil-free bowl. Using a double boiling method, gently heat the egg whites mixture up, while whisking constantly, until temperature reaches 140F (60C).  The sugar should have completely dissolved at this stage.
  2. Add the hot egg white-sugar mixture to your electric mixer mixing bowl (oil-free). Whip on high speed until the meringue is thick and glossy, and the bottom of the bowl feels cool (this is very important, otherwise the butter you’re about to add it will melt). This will take about 7-10 mins.
  3. Turn to medium-low speed, gradually add the softened butter cubes, one at a time, until incorporated. Continue beating until a silky smooth texture is reached. Add yuzu juice and salt, and beat until well combined. Store in refrigerator until ready to use.

For the honeycomb

  1. Line a flat, big tray with parchment paper. Set aside until ready to use. And you will need a sugar thermometer.
  2. Put sugar, honey, water, and golden syrup in a large saucepan with enough depth. Cook, while stirring continuously with a spatula, on low heat until all sugar dissolves.
  3. Increase the heat to medium high and bring to boil. Cook, without stirring, until the syrup reaches 154C on the thermometer. Immediately remove from heat and let the bubbles subside.
  4. Add the baking soda and mix thoroughly to let the reaction occur. Many bubbles will form and the mixture will rise so please be careful. Pour the mixture onto the prepared tray and set aside to cool completely.
  5. Break the honeycomb to pieces to your preferences.

Assemble

  1. Pipe the buttercream on top of each cupcake with your favourite nozzle, and top with honey comb pieces.


8 comments
Golden Haze – Ferrero Rocher Cupcake with Nutella Swiss Buttercream Frosting

Today let’s forget about going on (or thinking of going on – got you) diet, and just indulge ourselves in these golden goodness. These ferrero hazelnut cupcakes are simply perfect for celebratory occasions, because they’re

  • visually appealing
  • Sophisticated
  • indulgent

Ferrero_Rocher_Cupcake_with_Nutella_Swiss_Buttercream_Frosting

There’s a story behind this creation – my mum’s colleague tried my baked goods at work and asked me to prepare cupcakes for her wedding. As nervous as I usually am, I low-key panicked a little (okay actually A LOT) and have been wracking my brain to think about what I should make in order not to disappoint. Red Velvet? Carrot Cake? Oreo & Cream? As I started to get frustrated this idea suddenly popped up in my mind – thank God – and I decided to go along with it.

Ferrero_Rocher_Cupcake_with_Nutella_Swiss_Buttercream_Frosting3IMG_0916IMG_0925

Instead of conventional American buttercream, I opted for Swiss Buttercream for the cupcake frosting. Basically, making swiss buttercream requires an extra step of heating up egg whites and sugar in a double boiler, before you turn the egg white mixture into fluffy, glossy meringue. This method is highly sought-after, because 

1) it in general yields a more delicate & refined texture and taste
2) it does seem that the butter ratio in the frosting is significantly lowered

I followed the instructions given by Tessa on https://www.handletheheat.com/how-to-make-perfect-swiss-meringue-buttercream/with some minor adjustment. If you happen to encounter problems while making your swiss buttercream (it happens), do check this link out http://www.thebrewerandthebaker.com/archives/7640. It was a great help for me.

Ferrero_Rocher_Cupcake_with_Nutella_Swiss_Buttercream_Frosting2

IMG_0918

For the cupcakes themselves, I tried to incorporate some hazelnut elements into the cake batter, namely hazelnut meals and roasted hazelnut chocolate. And I’d be condemned if I dared to miss using the mighty hazelnut spread, Nutella, for my swiss buttercream, right? To complement the rich nutty flavours and to yield a refreshing and balanced final taste, I added a little bit tangy orange zest as well. I have to say, they brought so much more character and vibrancy to the cupcakes! Psss, If your greedy self wants to bring the cupcake’s luxuriousness to whole new level, edible gold paint is the way to go. Spread joy and love with these beautiful treats, people 😉

Ferrero_Rocher_Cupcake_with_Nutella_Swiss_Buttercream_Frosting7

Ingredients:

(make 15-16 cupcakes)

Cupcake: 

  • 1 ½  cup (188g) all purpose flour
  • 100g hazelnut meal
  • ¼  cup (25g) cocoa powder
  • 1 tsp baking powder
  • ¼ tsp salt
  • ½ cup (115g) butter, softened
  • 2 tbsp (30ml) vegetable oil ( I used canola oil)
  • ½ cup (113g) caster sugar
  • 2 large eggs, room temperature
  • ¼ cup (60ml) coffee, room temperature (2 tsp instant coffee powder melted in 1/4 cup (60ml) of water)
  • ½ cup (120ml) whole milk
  • 1 tsp (5ml) vanilla
  • 50g roasted hazelnut chocolate, melted (or you can use dark chocolate instead)
  • 1/2 orange, zest of

Nutella swiss buttercream:

  • 5 egg whites
  • 200g caster sugar
  • 280g chopped unsalted butter, soft
  • 50g Nutella
  • pinch of salt

Topping:

  • Unsweetened cocoa powder
  • Ferrero
  • toasted hazelnut, chopped

Instructions:

For the cupcake:

  1. Preheat oven to 350°F (175C) . Line pans with cupcake liners.
  2. In a mixing bowl, sift and combine flour, hazelnut meal, cocoa powder, baking powder, salt. Set aside.  
  3. In another mixing bowl, using an electric mixer, beat butter, oil, and sugar on medium high speed until creamy and smooth. This will take around 4-5 mins.
  4. Add eggs, one at a time, and continue beating for 1 min. Add coffee, milk and melted chocolate, vanilla, and cointreau. Continue beating for 30 secs.
  5. In 3 batches, pour the prepared dry ingredients into the mixture, and gently stir with a spatula until incorporated. Don’t overmix.
  6. Fill cupcake liners to nearly full and bake for 18-20 minutes, until a toothpick inserted in the cupcake’s centre comes out clean.

For the Nutella Swiss Buttercream:

  1. Add  egg whites and sugar to an oil-free bowl. Using a double boiling method, gently heat the egg whites mixture up, while whisking constantly, until temperature reaches 140F (60C).  The sugar should have completely dissolved at this stage.
  2. Add the hot egg white-sugar mixture to your electric mixer mixing bowl (oil-free). Whip on high speed until the meringue is thick and glossy, and the bottom of the bowl feels cool. This will take about 7-10 mins.
  3. Turn to medium-low speed, gradually add the softened butter cubes, one at a time, until incorporated. Continue beating until a silky smooth texture is reached. Add Nutella and salt, and beat until well combined.
  4. Pipe the buttercream onto the cupcakes with your favourite piping tip, and put a Ferrero Rocher, some chopped hazelnuts, and sprinkle sifted cocoa powder on top as decoration if desired.

Yum


5 comments
Mint Chocolate Cupcake

Same as every other post, this starts with a declaration of love, and today it’s about my favourite dessert flavour combo – Mint Chocolate. I believe everyone has his/her own weakness in food choice; and no matter how hard I try to resist it, mint chocolate is beyond doubt mine. This is especially true when it comes to ice-cream flavour. Why? It is equal parts cool and sweet, and the best ones are so refreshing that they’d brighten up my day and clear my mind.

IMG_0786

Despite how mouthwatering and delicate they look, cupcakes are not something I’d usually order outside. Yet, as it’s one of my goals to try out as many kinds of desserts as possible on this blog of mine, I might as well give it a go, right? 

IMG_0787

From the base to the top of each cupcake, this recipe delivers great textural fun and flavour layering that I always strive for in baking. First, there’s an oreo biscuit added at the bottom as a nice, crunchy surprise. Thanks to the melted mint chocolate and coffee, the cupcake base is moist and rich, with just enough mint hit coming through. Finally, together with the mint-flavoured buttercream as well as the finishing touch of a cheeky little Andes mint chocolate chip, what you have here is a daydream literally packed with minty goodness. Hmm, too cool to be true. (:

IMG_0806

IMG_0801


Ingredients (make 18 cupcakes):

For the cupcakes:

  • 1 1/2  cup (188g) plain flour
  • 30g cocoa powder
  • 1 tsp baking powder
  • 1/4 tsp salt
  • 18 Oreo biscuits
  • 1/2 cup (115g) butter,  softened
  • 2 tbsp (30ml) vegetable oil ( I used canola oil)
  • 1/2 cup (113g) caster sugar
  • 2 large eggs, room temperature
  • 1/4 cup (60ml) coffee, room temperature (2 tsp instant coffee powder melted in 1/4 cup (60ml) of water)
  • 50g Andes chocolate mint, melted
  • 1/2 cup (120ml) whole milk
  • 1 tsp (5ml) vanilla

For the buttercream frosting: 

  • 2 cups (250g) icing  sugar
  • 1 1/2 stick (170g) unsalted butter, at room temperature
  • 2 tbsp (30m1) whole milk or heavy cream
  • 1 tsp (5ml) vanilla extract
  • 1/2 tsp (2.5ml) peppermint extract
  • green food coloring
  • 1/2 tsp salt
  • 18  Andes chocolate mints

Instructions:

For the cupcakes:

  1. Preheat oven to 350°F (175C) . Line pans with cupcake liners.
  2. In a mixing bowl, sift and combine flour, cocoa powder, baking powder, salt. Set aside.  
  3. In another mixing bowl, using an electric mixer, beat butter, oil, and sugar on medium high speed until creamy and smooth. This will take around 4-5 mins.
  4. Add eggs, one at a time, and continue beating for 1 min. Add coffee, milk and melted mint chocolate, and continue beating for 30 secs.
  5. In 3 batches, pour the prepared dry ingredients into the mixture, and gently stir with a spatula until just incorporated. Do NOT overmix.
  6. Fill cupcake liners to nearly full and bake for 18-20 minutes, until a toothpick inserted in the cupcake’s centre comes out clean.

For the buttercream frosting:

  1. Using an electric mixer, beat the butter at medium-high speed until smooth.
  2. Slowly add in the sifted icing sugar using a tablespoon, and beat until smooth.
  3. Finally, add milk, vanilla, mint extract, food coloring, and salt, and beat until light and fluffy.
  4. Refrigerate the frosting for at least 30 mins before piping.
  5. Pipe the buttercream onto the cupcakes with your favourite piping tip, and put an Andes chocolate mint on top as decoration if desired.

Yum


6 comments
Vibrant lemon curd

Lemon curd is one of the greatest inventions on Earth. I love it because it’s refreshingly sweet & tart at the same time. Making it yourself may sound intimidating enough that you’d opt for store-bought ones in the supermarket. But let me get this straight – making lemon curd yourself only sounds sophisticated – it’s actually SO very easy. In fact, you might start thinking about giving away jars and jars of lemon curd to your friends, family or even your neighbours whenever the occasion calls for it LOL.

Full jar of Lemon Curd
This delicious and simple recipe is by Cupcake Jemma. I first came across her when I was searching for cupcake videos on YouTube. The cupcakes she made in her videos looked so good that I finally overcame my irrational fear of making them, and made my first round as soon as I could (but let’s leave that for next time). I absolutely admire her, for her unquestionable talent in baking, self-confidence, beauty, and tattoos. She has simplified the making process so much that I couldn’t wait to give it a go. And you know what? She didn’t lie; it’s just that simple.
Spoon of Lemon Curd
Once you have made a whole jar of lemon curd (applause!), there are limitless things you can do with it.  Stay tuned, as for the next few blog posts, I am going to share some of my fav lemon curd dessert recipes with you all!

Ingredients:

  • 5 egg yolks + 2 whole eggs
  • 1 lemon, zest of
  • 110 ml lemon juice (about 3 lemons)
  • 110 g caster sugar
  • 60g cold chopped butter

Instructions:

  1. Prepare a double boiler. To do so, fill a saucepan with 1-1.5 inches high of water and bring it to simmer. Find a heatproof bowl that fits in the saucepan without directly touching the water.
  2. Put all ingredients except the butter into the heatproof bowl. Using a whisk, stir the mixture continuously but gently to slowly cook the eggs. The lemon curd is ready when it starts to thicken up. This process will take about 5-7 mins. Remove the bowl from the saucepan.
  3. Stir in the cold chopped butter into the mixture. Mix until the butter completely melts.
  4. Put the lemon curd into an airtight container and store in the fridge for up to 2 weeks. Enjoy!

*You may sieve the lemon curd if you want a creamier texture, just remember that you only add the lemon zest in the end. 


4 comments