Home Tags Posts tagged with "hazelnut"
Tag:

hazelnut

Earthy Soul – Hazelnut Dark Chocolate Mousse with Baileys Ladyfingers (topped with chocolate soil)


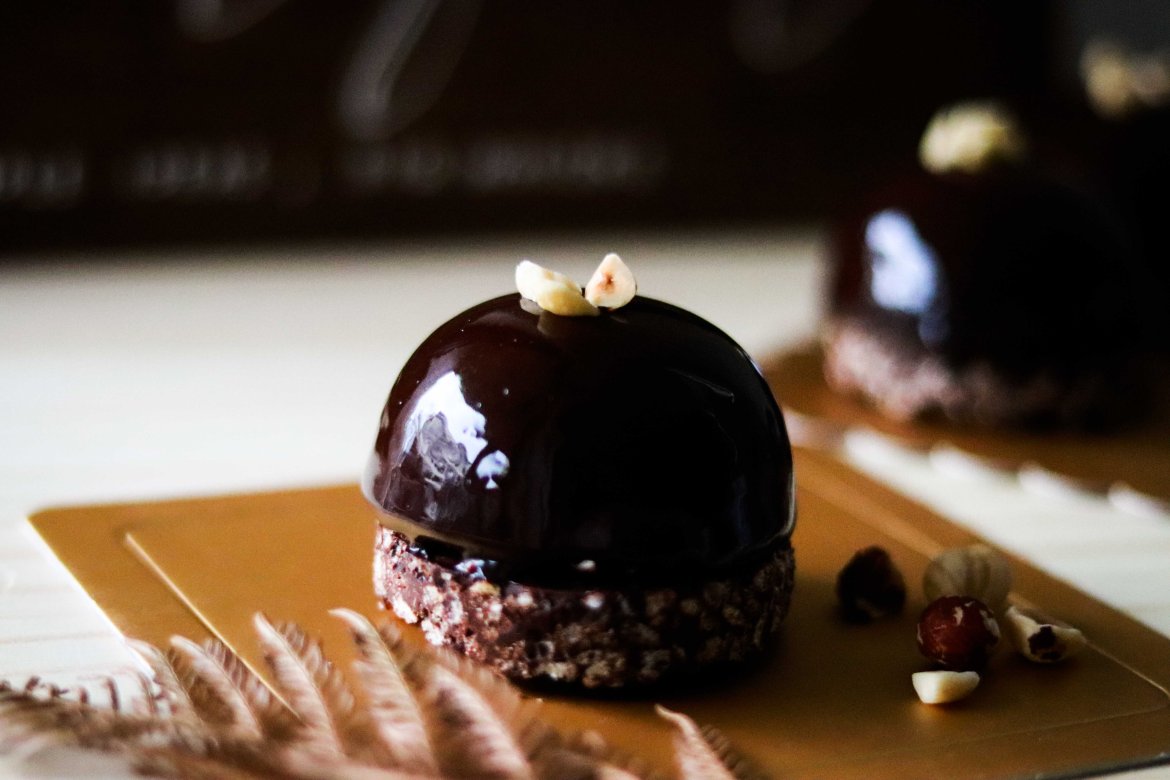
If you’re hosting a party soon and looking for a fancy-looking dessert recipe to impress your hungry guests, you’ve found the right place. This Hazelnut Bailey Chocolate Mousse Cup is made of the same rich & smooth hazelnut dark chocolate mousse used for the chocolate semi-sphere I shared before, with devilicious baileys-soaked lady fingers layered between. You think it cannot get any better? How about if I tell you it’s finished off with some crunchy hazelnut chocolate soil on top? Conventionally, people would put mint leaves onto the “soil” but I didn’t have any mint that day so I skipped it. Dig into these layers with a spoon and I promise you it’s one of the most satisfying feelings ever.


IMG_7797

IMG_7820

I came up with this idea when I was asked to prepare party food for a bunch of young adults. I got so pumped and I thought about what would make the best dessert to get the party going? Alcohol. Duh. Rum, Cointreau, limoncello and Coffee Liqueur are the to-go alcohol that I would use for desserts, but it’s about time I tried THE renowned Baileys, a creamy and smooth Irish whisky-and-cream-based liqueur that is usually served cold (with ice-cream, yum!). As you can all imagine, Baileys is delicious just as it is, but it goes extremely well with chocolate too. I didn’t hold myself back when I was dipping my ladyfingers into Baileys (I mean, why I should I?), so there could be 2 shots of baileys in each cup and everyone loved it. But you’re wary of getting your friends drunk, do try to limit yourself with it.

IMG_7828

I made my own ladyfingers this time using the recipe by Anna Olson (https://www.youtube.com/watch?v=ezR5UUqiOJc), as I always preferred making things from scratch if possible. But if you’re running out of time or feeling a little bit lazy, feel free to get them in supermarket. For those who don’t know what a ladyfinger is, it is essentially a simple sponge biscuit that resembles the shape of a large finger. It’s commonly used in layered dessert such as Tiramisu, and all sorts of parfaits; or it can be dipped in chocolate and enjoyed as it is. I love it for its subtleness and versatility. Make this boozy mousse cup and get indulged in all the creamy chocolatey goodness!

IMG_7817

Ingredients (make 10 mousse cup):

Hazelnut Dark Chocolate Mousse

  • 150g dark chocolate
  • 50g butter
  • 3 egg yolks
  • 6 egg whites
  • 35 caster sugar
  • 25g nutella

Ladyfingers (modified from http://www.foodnetwork.ca/recipe/chocolate-dipped-lady-fingers/12698/)

  • ½ cup (64g) all-purpose flour
  • 5 tbsp (63g) cornstarch
  • 3 eggs, separated and at room temperature
  • 9 tbsp (113g) sugar
  • ¼ tsp cream of tartar

Hazelnut Chocolate soil

  • 40g unsalted butter
  • 110g granulated sugar
  • 50g unsweetened cocoa powder
  • 50g  hazelnut, finely chopped
  • ¼ tsp salt

Instructions:

Hazelnut Dark Chocolate Mousse

  1. Using a double boiler, melt the chocolate on low heat until melted. Let it cool slightly. Stir in butter and nutella. Set aside.
  2. Using a whisk, lightly beat egg yolks until pale and creamy. Add to the chocolate mixture, mix well.
  3. Using an electric mixer, beat egg white until foamy. Gradually add sugar and beat egg white to stiff peaks.
  4. Gently stir in the chocolate-egg yolk mixture (in three additions) into the egg whites, mix until no obvious egg white is visible.  
  5. Refrigerate until ready to use.

Ladyfingers (extracted from http://www.foodnetwork.ca/recipe/chocolate-dipped-lady-fingers/12698/)

  1. Preheat the oven to 400 F and line 2 baking trays with parchment paper.
  2. Sift the flour and cornstarch together and set aside. Whip the egg yolks with 3 Tbsp of the sugar until thick and pale and they hold a ribbon when the beaters are lifted. In a separate bowl, whip the egg whites with the cream of tartar until foamy, then slowly add the remaining 6 Tbsp of sugar and continue whipping until the whites hold a medium peak when the beaters are lifted.
  3. Fold the whites into the yolk mixtures using a whisk, then fold in the flour until just incorporated. Fill a piping bag fitted with a large plain tip and pipe lady fingers onto the prepared trays that are 4-inches long and an inch apart (they will spread a little once piped). Bake for about 8 minutes, until the fingers are an even golden brown. Allow the fingers to cool completely before removing them from the trays.

Hazelnut Chocolate soil

  1. Using a double boiler or microwave, melt butter and allow it to cool to room temperature.
    While the butter is cooling, put sugar, cocoa powder and salt in a mixing bowl.  Mix well with a whisk and set aside.
  2. While whisking, slowly add the melted butter into the sugar cocoa mixture. Continue to mix until the mixture resembles dark soil.
  3. Add the chopped hazelnut and mix to provide the soil texture. Store in refrigerator until ready to use.

Assemble

  1. Put the hazelnut chocolate mousse in a piping bag with a plain round nozzle, pipe the mousse into the bottom of the cup. Then, break the ladyfingers into pieces (I broke one ladyfinger into 3 parts) and soak them generously in Baileys, and put them on top of the mousse.
  2. Repeat step one to create alternating layers of hazelnut chocolate mousse and Baileys-soaked ladyfingers, with the hazelnut chocolate mousse as the top layer in the end (Save half an inch of space for the chocolate soil).
  3. Cover the top hazelnut chocolate mousse with chocolate soil. Refrigerate until ready to serve.

 
Yum


12 comments
Layers of goodness – Hazelnut Dark Chocolate Mousse Sphere (with Coffee Creme Patissiere & White Wine Poached Pear & Crispy Chocolate Base)

This post is all about celebration – about finishing my first basic term @LCB passing all my assessment, about flying to Brisbane in a few days for vacation, and about finally successfully making a mousse sphere for the first time (after contemplating on it for a thousand years). This hazelnut chocolate mousse sphere is my cup of tea, hands down – it marries my favourite flavours into one dessert that tastes absolutely divine. I’ve always wanted to make mousse spheres but I was too scared to, until I recently watched Zumbo’s just dessert which motivated me to be a better “dessert maker”. While I was watching all those amatuer home-bakers produce their eye-opening, beautiful desserts, my heart ached for creating some of my own.

hazelnut_mousse_sphere_with_mirror_glaze4hazelnut_mousse_sphere_with_mirror_glaze7

IMG_7758

As I said, this dessert is celebratory, so I decided to apply some of the skills I learnt from school to it. It is also inspired by the Shiny Mirror Glaze Mousse Dome with Crispy Chocolate Base and Ganache Topping created by Cupcake Savvy’s Kitchen. Cutting through the sphere, you get a smooth French hazelnut chocolate mousse, creamy coffee creme patissiere, and a layer of refreshing poached pear that balances the richness & sweetness of chocolate. The dessert’s crunchy texture is provided by a crispy rice puff chocolate base (who doesn’t like indulging him/herself in loads of cocoa rice puffs???), and I finished it off with a shiny chocolate mirror glaze that renders the dessert a sophisticated look. How does that not sound heavenly?

hazelnut_mousse_sphere_with_mirror_glaze3

Special thanks to my friend who made me this stunning board with my baking motto – Simple Ideas, Big Whisks – written on it. <3 hazelnut_mousse_sphere_with_mirror_glaze10

hazelnut_mousse_sphere_with_mirror_glaze5

Realistically speaking, baking at home can be a bit tricky at times because you don’t always get the equipment or tools you need for your recipe. Like this time, I didn’t have a smaller sphere mold for my coffee creme patissiere so I had to carefully spoon it into the large mold, which could create a bit of a problem in terms of even layerings. But well, as as a pastry chef wanna-be, I need to be adaptive and make use of what I’ve got at home. Although the end result isn’t as perfect as I wanted, I am already quite happy with it. Anyway, give this recipe a go – If you are a hard-core chocolate fans, I think you will fall in love with it. Have a good weekend!

Ingredients:

Hazelnut Dark Chocolate Mousse

  • 150g dark chocolate
  • 50g butter
  • 3 egg yolks
  • 3 egg whites
  • 35 caster sugar
  • 25g nutella

Coffee Creme Patissiere (coffee pastry cream)

  • 150g milk + 1 tsp instant coffee powder
  • 1 tsp vanilla
  • 1 tbsp coffee liqueur
  • 25g egg yolk
  • 25g caster sugar
  • 10g corn flour
  • 10g butter

White Wine Poached Pear

  • 2 fresh pear, cored
  • 300ml white wine
  • 300ml water
  • 60g caster sugar
  • 1/2 tsp vanilla
  • 1/2 orange, zest of
  • 1/2 cinnamon stick

Crispy Chocolate Base

  • 200g dark chocolate
  • 100g choco rice puff

Chocolate Mirror Glaze

  • 100g sugar
  • 35g cocoa powder
  • 40g water
  • 70g double cream
  • 1 1/2 tsp gelatin
  • 1 1/2 tbsp water

Instructions:

Hazelnut Dark Chocolate Mousse

  1. Using a double boiler, melt the chocolate on low heat until melted. Let it cool slightly. Stir in butter and nutella. Set aside.
  2. Using a whisk, lightly beat egg yolks until pale and creamy. Add to the chocolate mixture, mix well.
  3. Using an electric mixer, beat egg white until foamy. Gradually add sugar and beat egg white to stiff peaks.
  4. Gently stir in the chocolate-egg yolk mixture (in three additions) into the egg whites, mix until no obvious egg white is visible.  
  5. Refrigerate until ready to use.

Coffee Creme Patissiere (coffee pastry cream)

  1. Using a saucepan, heat milk and instant coffee powder over medium heat and bring it to boil.
  2. While the milk is being heated, add egg yolk, sifted corn flour, caster sugar in a bowl. Mix well with a whisk until you can a thick, creamy consistency.
  3. With a steady mixing motion, pour 1/3 of the milk mixture to the egg mix to temper the egg.
  4. Pour the above mixture into the saucepan and cook over medium heat while whisking vigorously for at least 3 mins, until all starch is cooked. You will know it’s almost ready when it starts to bubble. Continue cooking for 1-2 mins. Remove it from the heat.
  5. Whisk in the butter and coffee liqueur until incorporated.
  6. Pour the custard into a bowl and cover the custard surface with a plastic wrap. This will prevent a skin from forming on top.
  7. Let the custard cool to room temperature. Refrigerate until ready to use.

White Wine Poached Pear

  1. Put all ingredients (except the pears) in a pan.
  2. Peel and core pears, gently poach (NOT boil) pears in syrup.
  3. Cook the pears for about 1 hour until they are soft. Use a stick to test every once in a while to see if the pears are done.
  4. When done, take out the pears from the pan to stop the cooking process.
  5. Cut one poached pear into small cubes, and blend the another one into puree or mash it with a fork. Pour the pear cubes into the puree and mix well. Refrigerate until ready for use.

Crispy Chocolate Base

  1. Using a double boiler, melt chocolate on low heat until melted. Pour the chocolate onto the rice puff and shape the mixture into a 2-cm thick layer.
  2. Refrigerate for at least 30 mins, and use a circular cutter that fits the size of the spheres to cut 6 circular bases. Refrigerate until ready to use. (If the base is too hard to cut through, run the cutter in a hot water bath and dry it before usage.)

Chocolate Mirror Glaze

  1. Add gelatin and cold water into a bowl. Stir and set aside until ready to use.
  2. In a saucepan, add sugar, cocoa powder, water and cream. Mix well with a whisk.
  3. Over medium heat, bring the mixture to boil while stirring continuously. Cook for about 2 mins until the mixture is smooth and no lump is visible.
  4. Turn off the heat, add the gelatin mix and stir well.
  5. Set aside and let cool to at least 35 C for usage.

Assembly

  1. Put the hazelnut chocolate mousse into the mold. Smoothen out the surface with a spoon until you can an even layer as the outer layer of the sphere. Freeze for 15 mins.
  2. Then, put the coffee creme patissiere in the mold. Freeze for 15 mins.
  3. Then, pour the pear mixture into the mold. Leave some space for the next step of closing the sphere with the hazelnut chocolate mousse. Freeze for 15 mins.
  4. Then, close all the spheres with a thin layer of the hazelnut chocolate mousse. Smoothen the surface with a off-set spatula. Freeze for at least 3 hours or preferably overnight to let it set completely.
  5. Carefully push the spheres out of the mold and put them on to a cooling rack. Pour the mirror glaze (at 35 C). Set it set. And put the glazed sphere on to the circular chocolate base.
  6. Sprinkle some chopped hazelnut on top as decorations.

Yum


8 comments
Golden Haze – Ferrero Rocher Cupcake with Nutella Swiss Buttercream Frosting

Today let’s forget about going on (or thinking of going on – got you) diet, and just indulge ourselves in these golden goodness. These ferrero hazelnut cupcakes are simply perfect for celebratory occasions, because they’re

  • visually appealing
  • Sophisticated
  • indulgent

Ferrero_Rocher_Cupcake_with_Nutella_Swiss_Buttercream_Frosting

There’s a story behind this creation – my mum’s colleague tried my baked goods at work and asked me to prepare cupcakes for her wedding. As nervous as I usually am, I low-key panicked a little (okay actually A LOT) and have been wracking my brain to think about what I should make in order not to disappoint. Red Velvet? Carrot Cake? Oreo & Cream? As I started to get frustrated this idea suddenly popped up in my mind – thank God – and I decided to go along with it.

Ferrero_Rocher_Cupcake_with_Nutella_Swiss_Buttercream_Frosting3IMG_0916IMG_0925

Instead of conventional American buttercream, I opted for Swiss Buttercream for the cupcake frosting. Basically, making swiss buttercream requires an extra step of heating up egg whites and sugar in a double boiler, before you turn the egg white mixture into fluffy, glossy meringue. This method is highly sought-after, because 

1) it in general yields a more delicate & refined texture and taste
2) it does seem that the butter ratio in the frosting is significantly lowered

I followed the instructions given by Tessa on https://www.handletheheat.com/how-to-make-perfect-swiss-meringue-buttercream/with some minor adjustment. If you happen to encounter problems while making your swiss buttercream (it happens), do check this link out http://www.thebrewerandthebaker.com/archives/7640. It was a great help for me.

Ferrero_Rocher_Cupcake_with_Nutella_Swiss_Buttercream_Frosting2

IMG_0918

For the cupcakes themselves, I tried to incorporate some hazelnut elements into the cake batter, namely hazelnut meals and roasted hazelnut chocolate. And I’d be condemned if I dared to miss using the mighty hazelnut spread, Nutella, for my swiss buttercream, right? To complement the rich nutty flavours and to yield a refreshing and balanced final taste, I added a little bit tangy orange zest as well. I have to say, they brought so much more character and vibrancy to the cupcakes! Psss, If your greedy self wants to bring the cupcake’s luxuriousness to whole new level, edible gold paint is the way to go. Spread joy and love with these beautiful treats, people 😉

Ferrero_Rocher_Cupcake_with_Nutella_Swiss_Buttercream_Frosting7

Ingredients:

(make 15-16 cupcakes)

Cupcake: 

  • 1 ½  cup (188g) all purpose flour
  • 100g hazelnut meal
  • ¼  cup (25g) cocoa powder
  • 1 tsp baking powder
  • ¼ tsp salt
  • ½ cup (115g) butter, softened
  • 2 tbsp (30ml) vegetable oil ( I used canola oil)
  • ½ cup (113g) caster sugar
  • 2 large eggs, room temperature
  • ¼ cup (60ml) coffee, room temperature (2 tsp instant coffee powder melted in 1/4 cup (60ml) of water)
  • ½ cup (120ml) whole milk
  • 1 tsp (5ml) vanilla
  • 50g roasted hazelnut chocolate, melted (or you can use dark chocolate instead)
  • 1/2 orange, zest of

Nutella swiss buttercream:

  • 5 egg whites
  • 200g caster sugar
  • 280g chopped unsalted butter, soft
  • 50g Nutella
  • pinch of salt

Topping:

  • Unsweetened cocoa powder
  • Ferrero
  • toasted hazelnut, chopped

Instructions:

For the cupcake:

  1. Preheat oven to 350°F (175C) . Line pans with cupcake liners.
  2. In a mixing bowl, sift and combine flour, hazelnut meal, cocoa powder, baking powder, salt. Set aside.  
  3. In another mixing bowl, using an electric mixer, beat butter, oil, and sugar on medium high speed until creamy and smooth. This will take around 4-5 mins.
  4. Add eggs, one at a time, and continue beating for 1 min. Add coffee, milk and melted chocolate, vanilla, and cointreau. Continue beating for 30 secs.
  5. In 3 batches, pour the prepared dry ingredients into the mixture, and gently stir with a spatula until incorporated. Don’t overmix.
  6. Fill cupcake liners to nearly full and bake for 18-20 minutes, until a toothpick inserted in the cupcake’s centre comes out clean.

For the Nutella Swiss Buttercream:

  1. Add  egg whites and sugar to an oil-free bowl. Using a double boiling method, gently heat the egg whites mixture up, while whisking constantly, until temperature reaches 140F (60C).  The sugar should have completely dissolved at this stage.
  2. Add the hot egg white-sugar mixture to your electric mixer mixing bowl (oil-free). Whip on high speed until the meringue is thick and glossy, and the bottom of the bowl feels cool. This will take about 7-10 mins.
  3. Turn to medium-low speed, gradually add the softened butter cubes, one at a time, until incorporated. Continue beating until a silky smooth texture is reached. Add Nutella and salt, and beat until well combined.
  4. Pipe the buttercream onto the cupcakes with your favourite piping tip, and put a Ferrero Rocher, some chopped hazelnuts, and sprinkle sifted cocoa powder on top as decoration if desired.

Yum


5 comments
Hojicha Chiffon Cake with Hazelnut Dark Chocolate Whiskey Ganache
I’m not gonna lie; a fluffy chiffon cake had been on my to-make list for ages, so I’m so thrilled that I finally made it happen! I think some of you might be able to relate – when you’re truly into something, you simply want to do it however you feel that day. Take myself as an example, I think about food almost every waking moment and would use baking as an excuse for EVERYTHING. Like today, feeling beaten up physically after a rough night, I decided to bake off some of the tiredness with this superb recipe👌🏻. Side view of Hojicha Chiffon Cake with Hazelnut Dark Chocolate Whiskey GanacheSo, for this chiffon cake, I went against the normally lighter approach to chiffon cake, and used a combination of Hojicha (aka roasted green tea), dark chocolate and whiskey. They’re three flavours that are equally bitter and complex, instantly invoking a feeling of maturity. What’s more, I only realised later that they’re all elements deeply ingrained in Japanese culture. From the cold tip of Hokkaido down to the summery bays of Okinawa, the core of such tastes is tied to the purity of nature. Doesn’t that sound amazing? 😉

Hojicha Chiffon Cake with Hazelnut Dark Chocolate Whiskey Ganache

As this is my first attempt of making a chiffon cake, I adapted the recipe of Green Tea Chiffon Cake by Just One CookBook. I am a big fan of the author, as she explains everything slowly and clearly, and I LOVE authentic home-style Japanese food. Feel free to pair the cake with fresh cream or fruits; but I wouldn’t mind having it on its own. Make this delicious treat for yourself and let me know how it goes!!

Close detail of Hojicha Chiffon Cake with Hazelnut Dark Chocolate Whiskey Ganache

Ingredients:

For the cake:

  • 3 egg yolks, room temperature
  • 30 g caster sugar
  • 3 tbsp (40ml) canola oil
  • 4 tbsp (60ml) milk
  • 75 g (⅔ cup) cake flour
  • 1 tbsp (10g) hojicha powder
  • 1 tsp baking powder
  • 1 tsp vanilla

For the meringue:

  • 3 egg whites, room temperature
  • 60g caster sugar
  • pinch of salt

For the ganache:

  • 100g 70% dark chocolate, chopped
  • 100g heavy cream
  • 20g butter
  • 2 tbsp whiskey

For the toppings:

  • 1/4 cup hazelnuts, chopped

Instructions:

For the cake:

  1. Preheat oven to 340F (170C).
  2. In a large mixing bowl, whisk egg yolks and caster sugar (30g) until light and pale. Add canola oil, milk and vanilla, and whisk until well combined.
  3. Sift in cake flour, hojicha powder, and baking powder to the egg yolk mixture. Mix until totally incorporated.
  4. In another bowl (make sure it’s oil free), add egg whites and salt. Using an electric mixer, beat the egg whites at high speed until foamy. Gradually add the caster sugar (60g) using a tablespoon, and beat until all sugar dissolves and soft peak forms. This will take about 5 mins. Gently fold the meringue into the cake mixture in 3 additions.
  5. Pour the mixture into the ungreased 17cm chiffon cake pan (please do NOT grease your pan or otherwise your chiffon cake won’t stick to the pan and therefore collapse while baking). Tap the pan a few times to release air bubbles.
  6. Bake for 30 minutes or until a toothpick inserted comes out clean.
  7. The cake must be cooled upside down; balance the chiffon pan on a tall heavy bottle using the pan indent. Leave until the cake is completely cool before removing it.
  8. To remove cleanly, keeping the pan upside down and use a thin sharp knife or thin offset spatula, running it gently around the cake.
  9. Place the serving plate on top of the cake (which will now become the base of the cake) and flip over. The cake should pop out easily.

For the ganache:

  1. Add the chopped chocolate in a mixing bowl. Set aside.
  2. In a saucepan, add cream, butter, and salt. Bring it just to boil over medium-high heat. Turn off the heat.
  3. Pour the cream mixture over chocolate. Let stand for 10 mins and don’t stir to prevent it from going grainy.
  4. Stir the mixture with a whisk until smooth and shiny. Add whiskey and mix well.
  5. Pour over the chiffon cake and top it with chopped hazelnuts.
6 comments
Drunken Morning –  Coffee Liqueur Double Dark Chocolate Hazelnut Muffin
When my boyfriend gave me a bottle of coffee liqueur bought this year’s Regional Flavours festival, I felt that I had to do something amazing to do it justice. But what? What could do it? That’s when it hit me.

Muffins were among the first things that I made when I started to bake. Although my very first batch of muffins (banana walnut muffins) was an absolute disaster (shhhhhh), these hearty little treats shall forever hold a special place in my heart. So yeah, muffins it is. Moist, light and fluffy ones at that–is there any better way to kick off the day?

tray of muffins with bottle of ohana winery cold drip coffee liqueurThis recipe is inspired by the “Chocolate Espresso Muffin” by Christiann Koepke; her recipe had me so pumped when I saw it, as it smartly includes a few interesting twists on the standard ingredients. The combination of the sweetness from white and brown sugar balances well with dark chocolate; the moistness is given by the olive oil and yogurt, with the added richness of the coconut milk; and last but not least, the subtle fragrance coming from the coffee liqueur, it’s perfect. Altogether, this is going to make mind-blowing muffins with a smooth, seductive coffee hit.

Not satisfied yet? Throw in some chopped hazelnuts – the best nut to pair with chocolate flavour in my opinion – and dark chocolate to give the muffins the needed crunch and gooeyness. I promise, with these gorgeous homemade muffins, your friends are going to love you, forevermore.
sprinkling white sugar on coffee hazelnut chocolate muffinsIngredients:
Make 12 muffins

  • 2 cups flour
  • 1/2 cup unsweetened cocoa powder
  • 1/2 tsp baking powder
  • 1 tsp baking soda
  • 3/4 tsp salt
  • 2/3 cup olive oil
  • 3/4 cup dark brown sugar
  • 1/4 cup white sugar
  • 2 eggs
  • 1/2 cup greek yogurt
  • 1 cup coconut milk
  • 250g dark chocolate, roughly chopped  
  • 1/4 cup coffee liquor
  • 1 cup hazelnuts, roughly chopped
  • 2 tbsp white sugar (for sprinkling)

Instructions:

  1. Preheat oven to 375F (190C). Grease a 12-cup muffin pan with olive oil or line it with muffin liners.
  2. Prepare a double boiler. Carefully melt 100g dark chocolate with the double boiler the chocolate until smooth. Remove from heat and set aside.
  3. In a bowl, sift in and combine well flour, cocoa powder, baking powder, baking soda, and salt.
  4. In another bowl, whisk olive oil, sugar, eggs, Greek yogurt, coconut milk, and the melted chocolate until smooth.
  5. Pour the dry flour mixture into the wet ingredients in three batches. Stir the batter gently with a spatula until everything is just incorporated. Stir in the remaining 150g dark chocolate and hazelnuts.
  6. Fill the muffin tin ¾ full and sprinkle white sugar on each muffin cup.
  7. Bake the muffins for 18-20 minutes, or until a toothpick inserted in the muffin’s centre comes out clean. Let cool in the pan for at least 10 minutes, before carefully removing them from the pan to cool completely on a rack.
5 comments