Home Tags Posts tagged with "chocolate"
Tag:

chocolate

Golden Haze – Ferrero Rocher Cupcake with Nutella Swiss Buttercream Frosting

Today let’s forget about going on (or thinking of going on – got you) diet, and just indulge ourselves in these golden goodness. These ferrero hazelnut cupcakes are simply perfect for celebratory occasions, because they’re

  • visually appealing
  • Sophisticated
  • indulgent

Ferrero_Rocher_Cupcake_with_Nutella_Swiss_Buttercream_Frosting

There’s a story behind this creation – my mum’s colleague tried my baked goods at work and asked me to prepare cupcakes for her wedding. As nervous as I usually am, I low-key panicked a little (okay actually A LOT) and have been wracking my brain to think about what I should make in order not to disappoint. Red Velvet? Carrot Cake? Oreo & Cream? As I started to get frustrated this idea suddenly popped up in my mind – thank God – and I decided to go along with it.

Ferrero_Rocher_Cupcake_with_Nutella_Swiss_Buttercream_Frosting3IMG_0916IMG_0925

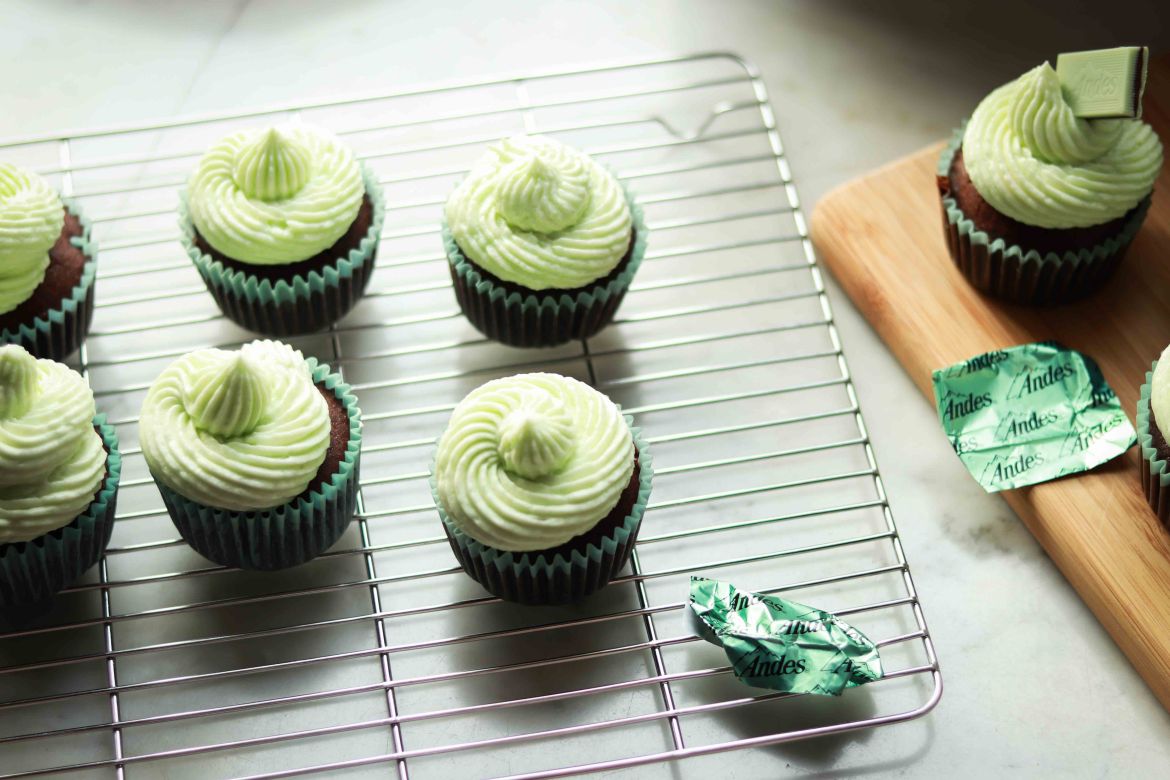
Instead of conventional American buttercream, I opted for Swiss Buttercream for the cupcake frosting. Basically, making swiss buttercream requires an extra step of heating up egg whites and sugar in a double boiler, before you turn the egg white mixture into fluffy, glossy meringue. This method is highly sought-after, because 

1) it in general yields a more delicate & refined texture and taste
2) it does seem that the butter ratio in the frosting is significantly lowered

I followed the instructions given by Tessa on https://www.handletheheat.com/how-to-make-perfect-swiss-meringue-buttercream/with some minor adjustment. If you happen to encounter problems while making your swiss buttercream (it happens), do check this link out http://www.thebrewerandthebaker.com/archives/7640. It was a great help for me.

Ferrero_Rocher_Cupcake_with_Nutella_Swiss_Buttercream_Frosting2

IMG_0918

For the cupcakes themselves, I tried to incorporate some hazelnut elements into the cake batter, namely hazelnut meals and roasted hazelnut chocolate. And I’d be condemned if I dared to miss using the mighty hazelnut spread, Nutella, for my swiss buttercream, right? To complement the rich nutty flavours and to yield a refreshing and balanced final taste, I added a little bit tangy orange zest as well. I have to say, they brought so much more character and vibrancy to the cupcakes! Psss, If your greedy self wants to bring the cupcake’s luxuriousness to whole new level, edible gold paint is the way to go. Spread joy and love with these beautiful treats, people 😉

Ferrero_Rocher_Cupcake_with_Nutella_Swiss_Buttercream_Frosting7

Ingredients:

(make 15-16 cupcakes)

Cupcake: 

  • 1 ½  cup (188g) all purpose flour
  • 100g hazelnut meal
  • ¼  cup (25g) cocoa powder
  • 1 tsp baking powder
  • ¼ tsp salt
  • ½ cup (115g) butter, softened
  • 2 tbsp (30ml) vegetable oil ( I used canola oil)
  • ½ cup (113g) caster sugar
  • 2 large eggs, room temperature
  • ¼ cup (60ml) coffee, room temperature (2 tsp instant coffee powder melted in 1/4 cup (60ml) of water)
  • ½ cup (120ml) whole milk
  • 1 tsp (5ml) vanilla
  • 50g roasted hazelnut chocolate, melted (or you can use dark chocolate instead)
  • 1/2 orange, zest of

Nutella swiss buttercream:

  • 5 egg whites
  • 200g caster sugar
  • 280g chopped unsalted butter, soft
  • 50g Nutella
  • pinch of salt

Topping:

  • Unsweetened cocoa powder
  • Ferrero
  • toasted hazelnut, chopped

Instructions:

For the cupcake:

  1. Preheat oven to 350°F (175C) . Line pans with cupcake liners.
  2. In a mixing bowl, sift and combine flour, hazelnut meal, cocoa powder, baking powder, salt. Set aside.  
  3. In another mixing bowl, using an electric mixer, beat butter, oil, and sugar on medium high speed until creamy and smooth. This will take around 4-5 mins.
  4. Add eggs, one at a time, and continue beating for 1 min. Add coffee, milk and melted chocolate, vanilla, and cointreau. Continue beating for 30 secs.
  5. In 3 batches, pour the prepared dry ingredients into the mixture, and gently stir with a spatula until incorporated. Don’t overmix.
  6. Fill cupcake liners to nearly full and bake for 18-20 minutes, until a toothpick inserted in the cupcake’s centre comes out clean.

For the Nutella Swiss Buttercream:

  1. Add  egg whites and sugar to an oil-free bowl. Using a double boiling method, gently heat the egg whites mixture up, while whisking constantly, until temperature reaches 140F (60C).  The sugar should have completely dissolved at this stage.
  2. Add the hot egg white-sugar mixture to your electric mixer mixing bowl (oil-free). Whip on high speed until the meringue is thick and glossy, and the bottom of the bowl feels cool. This will take about 7-10 mins.
  3. Turn to medium-low speed, gradually add the softened butter cubes, one at a time, until incorporated. Continue beating until a silky smooth texture is reached. Add Nutella and salt, and beat until well combined.
  4. Pipe the buttercream onto the cupcakes with your favourite piping tip, and put a Ferrero Rocher, some chopped hazelnuts, and sprinkle sifted cocoa powder on top as decoration if desired.

Yum


5 comments
Mint Chocolate Cupcake

Same as every other post, this starts with a declaration of love, and today it’s about my favourite dessert flavour combo – Mint Chocolate. I believe everyone has his/her own weakness in food choice; and no matter how hard I try to resist it, mint chocolate is beyond doubt mine. This is especially true when it comes to ice-cream flavour. Why? It is equal parts cool and sweet, and the best ones are so refreshing that they’d brighten up my day and clear my mind.

IMG_0786

Despite how mouthwatering and delicate they look, cupcakes are not something I’d usually order outside. Yet, as it’s one of my goals to try out as many kinds of desserts as possible on this blog of mine, I might as well give it a go, right? 

IMG_0787

From the base to the top of each cupcake, this recipe delivers great textural fun and flavour layering that I always strive for in baking. First, there’s an oreo biscuit added at the bottom as a nice, crunchy surprise. Thanks to the melted mint chocolate and coffee, the cupcake base is moist and rich, with just enough mint hit coming through. Finally, together with the mint-flavoured buttercream as well as the finishing touch of a cheeky little Andes mint chocolate chip, what you have here is a daydream literally packed with minty goodness. Hmm, too cool to be true. (:

IMG_0806

IMG_0801


Ingredients (make 18 cupcakes):

For the cupcakes:

  • 1 1/2  cup (188g) plain flour
  • 30g cocoa powder
  • 1 tsp baking powder
  • 1/4 tsp salt
  • 18 Oreo biscuits
  • 1/2 cup (115g) butter,  softened
  • 2 tbsp (30ml) vegetable oil ( I used canola oil)
  • 1/2 cup (113g) caster sugar
  • 2 large eggs, room temperature
  • 1/4 cup (60ml) coffee, room temperature (2 tsp instant coffee powder melted in 1/4 cup (60ml) of water)
  • 50g Andes chocolate mint, melted
  • 1/2 cup (120ml) whole milk
  • 1 tsp (5ml) vanilla

For the buttercream frosting: 

  • 2 cups (250g) icing  sugar
  • 1 1/2 stick (170g) unsalted butter, at room temperature
  • 2 tbsp (30m1) whole milk or heavy cream
  • 1 tsp (5ml) vanilla extract
  • 1/2 tsp (2.5ml) peppermint extract
  • green food coloring
  • 1/2 tsp salt
  • 18  Andes chocolate mints

Instructions:

For the cupcakes:

  1. Preheat oven to 350°F (175C) . Line pans with cupcake liners.
  2. In a mixing bowl, sift and combine flour, cocoa powder, baking powder, salt. Set aside.  
  3. In another mixing bowl, using an electric mixer, beat butter, oil, and sugar on medium high speed until creamy and smooth. This will take around 4-5 mins.
  4. Add eggs, one at a time, and continue beating for 1 min. Add coffee, milk and melted mint chocolate, and continue beating for 30 secs.
  5. In 3 batches, pour the prepared dry ingredients into the mixture, and gently stir with a spatula until just incorporated. Do NOT overmix.
  6. Fill cupcake liners to nearly full and bake for 18-20 minutes, until a toothpick inserted in the cupcake’s centre comes out clean.

For the buttercream frosting:

  1. Using an electric mixer, beat the butter at medium-high speed until smooth.
  2. Slowly add in the sifted icing sugar using a tablespoon, and beat until smooth.
  3. Finally, add milk, vanilla, mint extract, food coloring, and salt, and beat until light and fluffy.
  4. Refrigerate the frosting for at least 30 mins before piping.
  5. Pipe the buttercream onto the cupcakes with your favourite piping tip, and put an Andes chocolate mint on top as decoration if desired.

Yum


6 comments
Hopeless Romantic – Red Velvet Cake with Cream Cheese Frosting


Red Velvet Cake – always alluring by how romantic and gorgeous it looks. This is a recipe adapted from Sally’s Baking Addiction; her method of separating the eggs into yorks and whites in the process rendered the cake extra light and fluffy. Also, given that it’s my second time making it, I’m proud to say that I’ve adjusted the recipe to get the texture, flavour, and sweetness just right to my taste. My apologies, but how can I miss this chance to declare, that it’s indeed a BLOODY good cake :p?

IMG_0734

You are the one who’s in control of how red the cake should appear: rose, crimson, or even blood red. Start with a few drops of coloring and eyeball it as you go. Just be extra careful when handling with food coloring; otherwise, you may create a domestic crime scene and end up spending a day trying to clean your kitchen (which i may or may not have done it myself).

IMG_0758

In fact , I had difficulties trying to pinpoint what a red velvet cake tasted like. In the most basic terms, its sponge cake’s flavour profile contains three major components, namely vanilla, chocolate, and buttermilk, working with and complementing one another. Essentially, together with the rich cream cheese frosting, a red velvet cake is a light chocolate cake with a little citrus kick. Still a bit confused? Well, I guess the only way to find that out is to try it out yourself, and win the heart of your special someone.

IMG_0749

IMG_0778

Ingredients:

Cake

Dry ingredients:

  • 3 cups (360g) cake flour
  • 1 tsp baking soda
  • 3 tbsp (22g) unsweetened cocoa powder
  • 1/2 tsp salt

Wet ingredients:

  • 1/2 cup (115g) unsalted butter, softened to room temperature2
  • 1 1/2 cups (300g) white granulated sugar
  • 3/4 cup (180ml) vegetable oil (I used canola)
  • 4 egg yolks, room temperature
  • 4 egg whites, room temperature
  • 2  tbsp (30ml) vanilla extract
  • liquid or gel red food coloring
  • 1 cup (240ml) buttermilk, room temperature/ or 1 cup (240ml) whole milk + 1 tsp fresh lemon juice

Cream Cheese Frosting

  • 500g full-fat cream cheese, softened to room temperature5
  • 1/2 cup (115g) unsalted butter, softened to room temperature
  • 3 cups (360g) icing sugar
  • 3 tbsp (45ml) whole milk
  • 1 tbsp (15ml) vanilla extract
  • pinch of salt

Instructions:

For the cake:

  1. Preheat the oven to 350F (175C)
  2. Line two 8 inch cake pans with parchment paper. Set aside.
  3. In a mixing bowl, thoroughly sift in and combine flour, cocoa powder, baking soda, and salt (i.e. everything listed under dry ingredients).
  4. In another mixing bowl, using an electric beater, beat butter and sugar at medium-high speed for 4-5 mins until pale and fluffy. Add oil and continue beating for 2 min until incorporated.
  5. Add eggs yolks, one at a time, and beat at medium speed until well combined. Meanwhile, use a hand whisk to vigorous beat egg whites until floamy and thick; set aside.
  6. Add buttermilk (or milk + lemon juice) and vanilla extract to thin out the mixture.
  7. Add the prepared dry ingredients into the mixture in three batches. Stir gently with a spatula to combine everything until no flour can be seen. Avoid over-mixing.
  8. Finally, gently fold the prepared egg whites into the cake batter with a spatula.
  9. Pour the mixture evenly into the two prepared cake tins. Tap the pans several times to break any air bubbles. Bake for 45 mins, or until a toothpick inserted in the cake’s centre comes out clean.
  10. Cool the cake for 30 minutes in their pans, then take them out and put them onto a cooling rack to cool completely.
  11. While the cakes are cooling, prepare the cream cheese frosting.

For the cream cheese frosting:

  1. Using an electric mixer, beat the cream cheese and butter (at room temperature) at medium-high speed until smooth.
  2. Slowly add in the sifted icing sugar using a tablespoon, and beat until smooth.
  3. Add milk, vanilla, and salt, and beat until light and fluffy.
  4. Refrigerate the frosting for at least 1 hour to get firm so as to hold its shape while you work on it later.

Assembly:

  1. Level the cake layers by slicing the top curve of the cakes with a sharp knife to achieve a flat surface (reserve and crumble the unwanted cake parts into small pieces for decoration).
  2. Peel the parchment paper from the base of the cake layers and place one layer onto a plate or a cake board placed on a revolving cake stand (if you have it).
  3. Now we do the crumb coat first.
  4. Put a generous amount of frosting on the middle of the cake layer. Using an offset spatula, spread the frosting carefully and top it with the second cake layer. Frosting the top and sides of the cakes. Get a nice, smooth coat of icing with a bench scraper or a spatula.
  5. Put the crumb-coated cake in the refrigerator for an hour to get the frosting nice and firm. Once the cake is chilled, frost your cake evenly with another layer of frosting using the same method. Get rid of all the peaks and blemishes in the process.
  6. Transfer the remaining cream cheese frosting into a pastry bag tipped with a tip that you prefer. Pipe dollops of cream onto the cake, sprinkle cake crumbles, stick thin strawberry slices to the side as garnish if desired.
  7. Refrigerate for at least 1 hour. Enjoy!


8 comments
A Taste of Heaven @Janice Wong Dessert Bar

You may or may not have noticed that I didn’t update my blog much the past three weeks. The reason being a rainy getaway in Tokyo. The next thing you might notice is that this post is deliberately poetic. It can’t be helped – I felt obligated to express my feelings here after my visit to Janice Wong Dessert Bar in Shinjuku, Tokyo. Truth be told, I miss being a university student studying English and films a bit too much at the moment.

IMG_0689

Janice Wong, my idol, so bold, so brave, so adventurous, for her my admiration is like a tidal wave – unstoppable and recurring. A renowned Singaporean pastry chef, forever changing and challenging people’s perception of food. What she offers to the world is an edible form of art; she artfully puts forward a performance full of surprises, one that simultaneously stuns and mesmerises her “audience” in the most devilish ways. That said, looking through her dessert menu was eye-opening enough, for every dessert seemed so heavenly and well-designed that I couldn’t wait to devour all of them.

IMG_0667

After some intense struggles, I decided to order Chocolate H2O (please tell me who doesn’t find chocolate irresistible). One of the main factors of the unique eating experience here is that you, as the curious customers, get to witness/engage in the dessert-making process – I could see the focus and passion in the staff’s eyes when they brought the desserts into life, attending to every single detail of the final dish. As I watched, my hungry soul was already aching to have a taste.

IMG_0666

Chocolate H2O (Bitter chocolate water mousse/Salted caramel/ Yuzu kalamansi gel/ Yuzu sorbe) definitely made its presence felt through its visual aesthetics. One thing I can’t resist about Janice Wong’s dessert is how every single element of the dish maneuvers its ways into creating some sheer magic. The bitterness of the chocolate was effectively elevated by the salted caramel, but then balanced by the slightly sour yuzu components. Such a fine combination of flavours made every bite an absolute pleasure – it instantly filled my heart with happiness, as if some sort of ecstasy flew through my blood.

IMG_0674

To end this post, I am going to put up Janice Wong’s philosophy about her approach to food as a timely reminder for myself.

“Welcome to our artistic gastronomic world of flawless imperfection and flawed perfection.

It is not to complex. Open your mind as I have and you will, too, see, taste and feel differently.

These seemingly disparate sources of inspiration and the creation that stem from them are all threaded by a commonality a pursuit for perfection in imperfection, and an appreciation of imperfection in perfection.”

Note to self:

  • Be fearless and resilient, because
  • as long as you know what you’re aiming at, the sky is the limit to how far you should go to achieve it.
1 comment
Tiramisu Crepe Cake cross section
Presenting, a romantic twist on a classic dessert –  tiramisu crepe cake. It’s a work of patience, patience, and more patience. Making this cake was a huge pleasure for me though; by flipping over layer after layer of crepes, I had lots of alone time in the kitchen to ponder on life (lol, jk, or not).  Take this as a chance to think about all the little things and perhaps your own dessert dreams. Maybe you won’t believe it, but I wasn’t always a big fan of desserts. Yet, Tiramisu gets me nostalgic in the best ways, because it was one of my fav childhood treats when dining out with family. Slice of Tiramisu Crepe CakeThis recipe is inspired by a recipe from Tatyana’s Everyday Food, but a lot of changes have been made to ensure the crepe cake fits my own baking style. Tatyana, again, is a beloved Youtuber whose desserts never fail to amaze me. I’m so thankful that she actually was the one who pushed me to try making multi-layer cake in the first place. Tiramisu Crepe Cake cross section

Instead of ladyfingers soaked in coffee in the traditional Italian Tiramisu, there are now coffee-flavoured crepes wonderfully layered with a rich, sweet mascarpone cheese cream filling. If you don’t readily have coffee liqueur at home, feel free to substitute another liquor, such as dark rum, amaretto or the most conventionally used Marsala. Honestly, whatever alcohol you use, it’s going to elevate the flavours and bring your crepe cake to another level. What can I say, it’s the two most iconically romantic western cultures working together to melt hearts. 😉

close up of Tiramisu Crepe Cake

flat lay of Tiramisu Crepe Cake

Ingredients:

For the crepes:

  • 150g (1 1/4 cup) all-purpose flour
  • 5 large eggs
  • 25g white granulated sugar
  • 480ml whole milk
  • 1 tbsp instant coffee powder melted in 60ml water
  • 60ml melted butter
  • 2 tbsp coffee liqueur
  • 1 tsp  vanilla

For the filling:

  • 400ml heavy cream, chilled
  • 250g mascarpone cheese
  • 120g icing sugar
  • 1/4 tsp salt
  • 1 tsp vanilla
  • 2 tbsp coffee liqueur

Instructions:

Components

  1. Prepare the filling before creating any crepes.
  2. In a large mixing bowl, add mascarpone cheese and icing sugar. Using an electric mixer, beat them on medium speed until smooth and creamy. Add heavy cream, salt, vanilla, and coffee liqueur. Continue mixing on medium speed until light and fluffy. Don’t overmix, otherwise the over-whipped cream will be grainy and stiff. Refrigerate for later use.
  3. In a second large mixing bowl prepare the crepe batter. Whisk eggs, sugar, and flour until smooth. Add coffee mixture (make sure it has already cooled down to room temperature), milk, butter, sugar, coffee liqueur, and vanilla. Combine well until no lumps can be seen.
  4. Heat a nonstick pan over medium heat.  Pour 1/4 cup batter into center of the pan; swirl pan to evenly coat the entire base with batter. Cook for about 1 minute or until the edge can be easily lifted with a spatula. Flip crepe; cook for another 20 seconds. Transfer to a large plate to cool. Repeat with remaining batter. The batter should be enough to make 18-20 crepes. Remember to cool the crepes completely before assembling the cake.

When both the filling and crepes are completely cooled, prepare components for assembly.

Assembly

  1. Place a crepe onto a flat surface as your crepe cake base. Drop 1/4 cup filling onto this base and spread the filling evenly to almost the edges. Continue this process with remaining crepes and filling, leaving the last crepe with no filling.
  2. Sprinkle cocoa powder on top of the cake. Cover the crepe cake with plastic wrap or put it in an airtight container. Refrigerate for at least 4 hours or preferably overnight to let the cake set nicely. Enjoy! 


6 comments
Hojicha Chiffon Cake with Hazelnut Dark Chocolate Whiskey Ganache
I’m not gonna lie; a fluffy chiffon cake had been on my to-make list for ages, so I’m so thrilled that I finally made it happen! I think some of you might be able to relate – when you’re truly into something, you simply want to do it however you feel that day. Take myself as an example, I think about food almost every waking moment and would use baking as an excuse for EVERYTHING. Like today, feeling beaten up physically after a rough night, I decided to bake off some of the tiredness with this superb recipe👌🏻. Side view of Hojicha Chiffon Cake with Hazelnut Dark Chocolate Whiskey GanacheSo, for this chiffon cake, I went against the normally lighter approach to chiffon cake, and used a combination of Hojicha (aka roasted green tea), dark chocolate and whiskey. They’re three flavours that are equally bitter and complex, instantly invoking a feeling of maturity. What’s more, I only realised later that they’re all elements deeply ingrained in Japanese culture. From the cold tip of Hokkaido down to the summery bays of Okinawa, the core of such tastes is tied to the purity of nature. Doesn’t that sound amazing? 😉

Hojicha Chiffon Cake with Hazelnut Dark Chocolate Whiskey Ganache

As this is my first attempt of making a chiffon cake, I adapted the recipe of Green Tea Chiffon Cake by Just One CookBook. I am a big fan of the author, as she explains everything slowly and clearly, and I LOVE authentic home-style Japanese food. Feel free to pair the cake with fresh cream or fruits; but I wouldn’t mind having it on its own. Make this delicious treat for yourself and let me know how it goes!!

Close detail of Hojicha Chiffon Cake with Hazelnut Dark Chocolate Whiskey Ganache

Ingredients:

For the cake:

  • 3 egg yolks, room temperature
  • 30 g caster sugar
  • 3 tbsp (40ml) canola oil
  • 4 tbsp (60ml) milk
  • 75 g (⅔ cup) cake flour
  • 1 tbsp (10g) hojicha powder
  • 1 tsp baking powder
  • 1 tsp vanilla

For the meringue:

  • 3 egg whites, room temperature
  • 60g caster sugar
  • pinch of salt

For the ganache:

  • 100g 70% dark chocolate, chopped
  • 100g heavy cream
  • 20g butter
  • 2 tbsp whiskey

For the toppings:

  • 1/4 cup hazelnuts, chopped

Instructions:

For the cake:

  1. Preheat oven to 340F (170C).
  2. In a large mixing bowl, whisk egg yolks and caster sugar (30g) until light and pale. Add canola oil, milk and vanilla, and whisk until well combined.
  3. Sift in cake flour, hojicha powder, and baking powder to the egg yolk mixture. Mix until totally incorporated.
  4. In another bowl (make sure it’s oil free), add egg whites and salt. Using an electric mixer, beat the egg whites at high speed until foamy. Gradually add the caster sugar (60g) using a tablespoon, and beat until all sugar dissolves and soft peak forms. This will take about 5 mins. Gently fold the meringue into the cake mixture in 3 additions.
  5. Pour the mixture into the ungreased 17cm chiffon cake pan (please do NOT grease your pan or otherwise your chiffon cake won’t stick to the pan and therefore collapse while baking). Tap the pan a few times to release air bubbles.
  6. Bake for 30 minutes or until a toothpick inserted comes out clean.
  7. The cake must be cooled upside down; balance the chiffon pan on a tall heavy bottle using the pan indent. Leave until the cake is completely cool before removing it.
  8. To remove cleanly, keeping the pan upside down and use a thin sharp knife or thin offset spatula, running it gently around the cake.
  9. Place the serving plate on top of the cake (which will now become the base of the cake) and flip over. The cake should pop out easily.

For the ganache:

  1. Add the chopped chocolate in a mixing bowl. Set aside.
  2. In a saucepan, add cream, butter, and salt. Bring it just to boil over medium-high heat. Turn off the heat.
  3. Pour the cream mixture over chocolate. Let stand for 10 mins and don’t stir to prevent it from going grainy.
  4. Stir the mixture with a whisk until smooth and shiny. Add whiskey and mix well.
  5. Pour over the chiffon cake and top it with chopped hazelnuts.
6 comments
Tray of Salted Double Dark Chocolate Brookies
Broken Salted Double Dark Chocolate BrookieIt’s a Sunday morning, why don’t we talk about cookies? And by cookies, I actually mean “brookies”, a term made popular by a late night snack challenge on Australian Master Chef. This recipe is adapted from said Master Chef Australia 2016 recipe with some minor modifications. Oh, it’s the ultimate treat for chocolate lovers (i.e. everyone). I am not always down for such absolutely indulgent desserts but, seriously, when taken out fresh from the oven, these cookies look just like they taste – INSANE. They’re sweet, soft, rich, gooey, and the chocolate chips will just ooze out upon touching. In short, it’s magic, except it’s pretty dark and all too real.

1 comment
Drunken Morning –  Coffee Liqueur Double Dark Chocolate Hazelnut Muffin
When my boyfriend gave me a bottle of coffee liqueur bought this year’s Regional Flavours festival, I felt that I had to do something amazing to do it justice. But what? What could do it? That’s when it hit me.

Muffins were among the first things that I made when I started to bake. Although my very first batch of muffins (banana walnut muffins) was an absolute disaster (shhhhhh), these hearty little treats shall forever hold a special place in my heart. So yeah, muffins it is. Moist, light and fluffy ones at that–is there any better way to kick off the day?

tray of muffins with bottle of ohana winery cold drip coffee liqueurThis recipe is inspired by the “Chocolate Espresso Muffin” by Christiann Koepke; her recipe had me so pumped when I saw it, as it smartly includes a few interesting twists on the standard ingredients. The combination of the sweetness from white and brown sugar balances well with dark chocolate; the moistness is given by the olive oil and yogurt, with the added richness of the coconut milk; and last but not least, the subtle fragrance coming from the coffee liqueur, it’s perfect. Altogether, this is going to make mind-blowing muffins with a smooth, seductive coffee hit.

Not satisfied yet? Throw in some chopped hazelnuts – the best nut to pair with chocolate flavour in my opinion – and dark chocolate to give the muffins the needed crunch and gooeyness. I promise, with these gorgeous homemade muffins, your friends are going to love you, forevermore.
sprinkling white sugar on coffee hazelnut chocolate muffinsIngredients:
Make 12 muffins

  • 2 cups flour
  • 1/2 cup unsweetened cocoa powder
  • 1/2 tsp baking powder
  • 1 tsp baking soda
  • 3/4 tsp salt
  • 2/3 cup olive oil
  • 3/4 cup dark brown sugar
  • 1/4 cup white sugar
  • 2 eggs
  • 1/2 cup greek yogurt
  • 1 cup coconut milk
  • 250g dark chocolate, roughly chopped  
  • 1/4 cup coffee liquor
  • 1 cup hazelnuts, roughly chopped
  • 2 tbsp white sugar (for sprinkling)

Instructions:

  1. Preheat oven to 375F (190C). Grease a 12-cup muffin pan with olive oil or line it with muffin liners.
  2. Prepare a double boiler. Carefully melt 100g dark chocolate with the double boiler the chocolate until smooth. Remove from heat and set aside.
  3. In a bowl, sift in and combine well flour, cocoa powder, baking powder, baking soda, and salt.
  4. In another bowl, whisk olive oil, sugar, eggs, Greek yogurt, coconut milk, and the melted chocolate until smooth.
  5. Pour the dry flour mixture into the wet ingredients in three batches. Stir the batter gently with a spatula until everything is just incorporated. Stir in the remaining 150g dark chocolate and hazelnuts.
  6. Fill the muffin tin ¾ full and sprinkle white sugar on each muffin cup.
  7. Bake the muffins for 18-20 minutes, or until a toothpick inserted in the muffin’s centre comes out clean. Let cool in the pan for at least 10 minutes, before carefully removing them from the pan to cool completely on a rack.
5 comments
Older Posts